
Custom black Walnut dresser, Completed Summer 2017
Last spring I was contacted by a customer who was interested in a full bedroom set--a king bed, a pair of nightstands, and a dresser. One small problem was I had not built a dresser to match this set in the past, but it was high on my list of priorities if I ever had the impetus. This was the best-case scenario to finally get a matching piece built.
Every piece has its own challenges, even if it's a piece I've built several times before, but for a new piece of this scale, there were many more than I thought when planning the project. One major design choice that influenced the lumber used--the waterfall miters that has the grain flowing continuous from one side to the top to the second side--made things tough early on in that only the longest slabs available would work. For a case that has two 36" sections on the sides, plus a 72" top, I needed a 12' long slab (or slabs) to allow for the grain to be continuous along the length. Thanks to Goby Walnut, I had several possibilities, but it took a few weeks of checking back to find the right pieces that stayed in our budget and fit the minimum requirements. The final slabs were a book-matched pair that were 144" long and 18" wide each with two live-edges.

The first of two slabs
They were only 6/4 lumber (meaning 1.5" thick before flattening) so I knew I didn't have a lot to waste when getting the pieces flat across its length--very important for the mitered waterfall. These slabs were too big to process and flatten in my small shop, so I took them to another Portland business--Creative Woodworking--that has incredible industrial machinery that they rent time on for jobs like this. Their huge planer/sander can plane and sand a slab all in the same pass, and for large slabs like this it can generally flatten and clean up the slab within a few passes. Because they were so long, though, finding a flat plane over 156" was problematic--I'd have a 1/4" thick slab or less if I tried to get it perfectly flat over the length. So we cut down the slabs at the miters--leaving a section of 72" in the middle. This was back around May/June, so my memory is somewhat foggy, but we ripped ~12" sections out of each slab with square edges on both sides, then glued up these into one large panel, and THEN crosscut the sections out. Once all of that was done, the two 36"+ (I think closer to 48" remainders for the sides) and the 72" top section could be planed to flat and smooth, save some problematic low sections located in the middle of the top panel and a large crack on one of the end panels. After flattening, it took a few minutes on their huge Martin sliding table saw to cut perfect miters for the waterfall edge. From there, I could take the milled panels back to my shop to work on joinery.

Waterfall miter
The miters were nearly perfect off the sliding table saw, so once I got them back to the shop, I reinforced the two miters with dominos, which would also eventually help with alignment during the glue up. I glued up a panel for the bottom of the case (along with more dominos for that joint). The internal structure does a lot to help keep the case square and strong for decades. I used a dovetail router bit and jig to rout out sliding dovetails in the panel sides, top and bottom. I carried these all the way through with the thought that the side panels especially would be reinforced by having a flat support on the back to keep them from cupping. Once the case sides and top/bottom were cut, I prefinished the inside faces and glued up the outer case. This allowed me to then cut and fit the stretcher components that would frame in the drawers. This dresser has 3 smaller drawers, 2 medium and 2 slightly-larger-than-medium drawers. The video below shows the dry fit of all of these stretchers going in.
From here, I also prefinished those stretcher pieces and glued them into place. The exposed sections of the sliding dovetails were filled with small stock and trimmed flush. The drawers could now be built. I used western maple, milled down to 1/2" thick to be able to work seamlessly with the soft-close Blum drawer slides. I built a box joint jig for the table saw, and along with a dado stack I was able to batch out the drawer joinery fairly quickly.

Drawer boxes before installed on the slides
The drawer boxes were glued up, finished, and fit to the slides, which were also fit to their respective openings. This was my first time using the Blum hardware. They are straight-forward to install and adjust, and the motion of opening and closing them is amazing. Being the first time, I had not sized the drawer boxes quite as accurately (depth-wise) as the directions to the slides expect/require. I was able to make some small tweaks and they worked wonderfully. The exposed faces were obviously going to be covered with walnut, which was quite a process--more on that in a minute.
First, on to the base. I had built the bed and nightstands previously, and had tweaked the nightstand base to be able to work for the dresser as well. Four shaped legs that also matched the shaping on the bed was the main goal, as well as the stretchers between each leg. The end result for the dresser was simple enough in design and execution, but a really nice highlight to the boxiness of the dresser case.

The base assembled and finished
I added two cross-pieces in the middle of the case with adjustable feet that help carry the massive weight of the piece. The joinery between the feet and the stretchers were custom sized loose tenons (doubled-up), and they were draw-bored in place. Drawboring doesn't make perfect sense with loose tenons, but in theory the order of operations made them work very well: both the legs and stretchers are mortised; tenons sized and fit; glued into the stretcher pieces (long-grain to long-grain); once the glue is cured, the legs are fit and the pin locations are marked and drilled; final assembly of the legs to the stretchers, with the pins driving home the joint and pulling everything tight. Very happy with the end result. The base was connected to the case with threaded inserts and floating buttons (front and back, respectively).
Back to the drawer fronts. This part alone was a huge time-suck and added to the length of the project by about a month. Originally, I was planning on doing solid wood drawer fronts, using the live-edge pieces left over from the original two slabs. They would match the case perfectly, and have some nice sapwood details. The problem, though, was there was slightly too little left over to cover the whole front in a way that made sense--the sapwood wouldn't line up with the drawer seams, there'd be weird divisions, etc. So I had to figure out another solution, but I really wanted to use this material.
I eventually decided to try resawing the best couple scraps from those slabs to make veneer fronts. I've never done veneering before, and spent hours/days researching different methods. Hammer veneer? Vacuum bags? Different glues? All things I had to acquaint myself with in a short amount of time. I landed on a plan that made sense to me--build some shop-made cauls specific to the sizes I needed to be able to clamp the veneers on evenly enough so that there weren't air bubbles or other problems with the glue (a vacuum bag would have been much easier and more ideal, but wasn't in the budget at the time).
I milled up some quarter-sawn walnut and glued up 3/4" thick panels of black walnut to serve as the substrate. I spent time resawing those slab scraps to get around 1/8" thick veneers with a rough texture from the bandsaw. I spent a lot of time on the drum sander (a new-used tool bought during this project) to get consistent thicknesses. I also resawed some other walnut I had in the shop to make up equivalent panels for the backs of the panels, as I had read the moisture loss/equilibrium of the core panel would be messed up gluing onto one side and not the other (because of the glue I was using). Eventually, I got these veneers down to a cleaned up thickness that was maybe 3/32"? I honestly don't remember, but it was much more substantial than the paper thin veneers associated with some mass-produced furniture (not that all thin veneers are bad--I know some of the nicest furniture in the world uses them as well). But overall the perception of veneers is thrown off by the crap that's applied with contact cement and peels up eventually.

The veneers edge glued and ready to be attached to the panels
The resawn and sanded veneers were not wide enough to cover the drawer fronts, so I hand jointed the edges and glued these together with blue tape. This worked surprisingly well, as the blue tap is pulled to give just enough pressure to keep the edges securely together. There was a learning curve, but I did this 14 times, so I got the process down. Once the glue was set, a few more passes through the drum sander cleaned the glue lines up, and I was ready to press them onto the panels. This step went fine, but took a few days as I only had two caul setups made up. The panels came out perfectly flat, and could then be carefully cut to size with the continuous grain from panel to panel in mind. These were then sized to fit the drawers, and attached with screws from the inside.

Starting to attach the fronts to the drawers
The drawer pulls took a bit of trial and error, but the customer had some inspirations from a trip they took to the redwoods. We used a shape of a certain fungi that grows off the side of a tree, almost like a fan (no idea on the name or details). I roughed them out on the bandsaw, used a router bit to get a little relief for fingers, and set up a jig to rout out a relief into the drawer fronts themselves. That was a hold-your-breath moment, as the fronts were literally irreplaceable without replacing every one of them. I love how these came out, as they don't detract or interfere with the sapwood highlights of the drawer fronts.

Rough shape positioned on the top edge of a drawer front

The pull glued in place, reinforced with brass screws
From here, there was a lot of sanding and final fitting, before the finish started to go on. I used Osmo Polyx Oil, clear matte finish. It's a hardwax oil that goes on like oil, but is basically some sort of liquefied wax that cures to a very smooth, low luster finish. It also doesn't build up to leave a plastic-looking coating. It soaks into the grain and can be renewed and repaired simply.

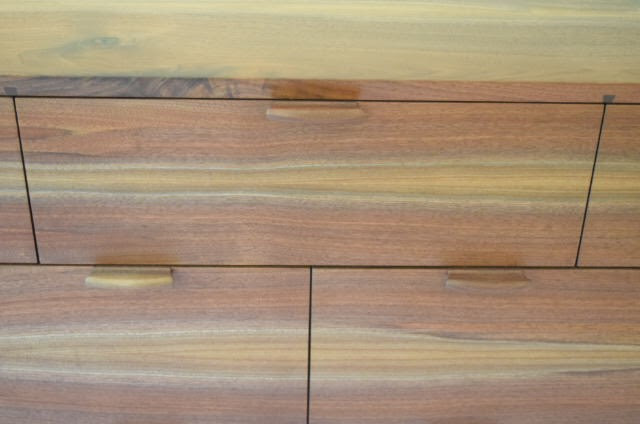
Waterfall edge with finish

Drawer fronts finished and installed

Delivered!


Overall, this was an incredibly challenging project, but was special in that I was able to overcome my shortcomings--lack of experience with techniques--and grow as a furniture maker. I've heard from several other furniture makers (probably mostly through podcasts) that one of the best ways to grow as a woodworker is to take on projects that you don't know how to do the whole way through. Starting this project, I knew how to get from the beginning to the end in theory, but coming upon problems--the drawer fronts being the main challenge when I needed to pivot to a different solution--forced me to adapt and figure out the way through. Thanks to some amazing and very patient customers!
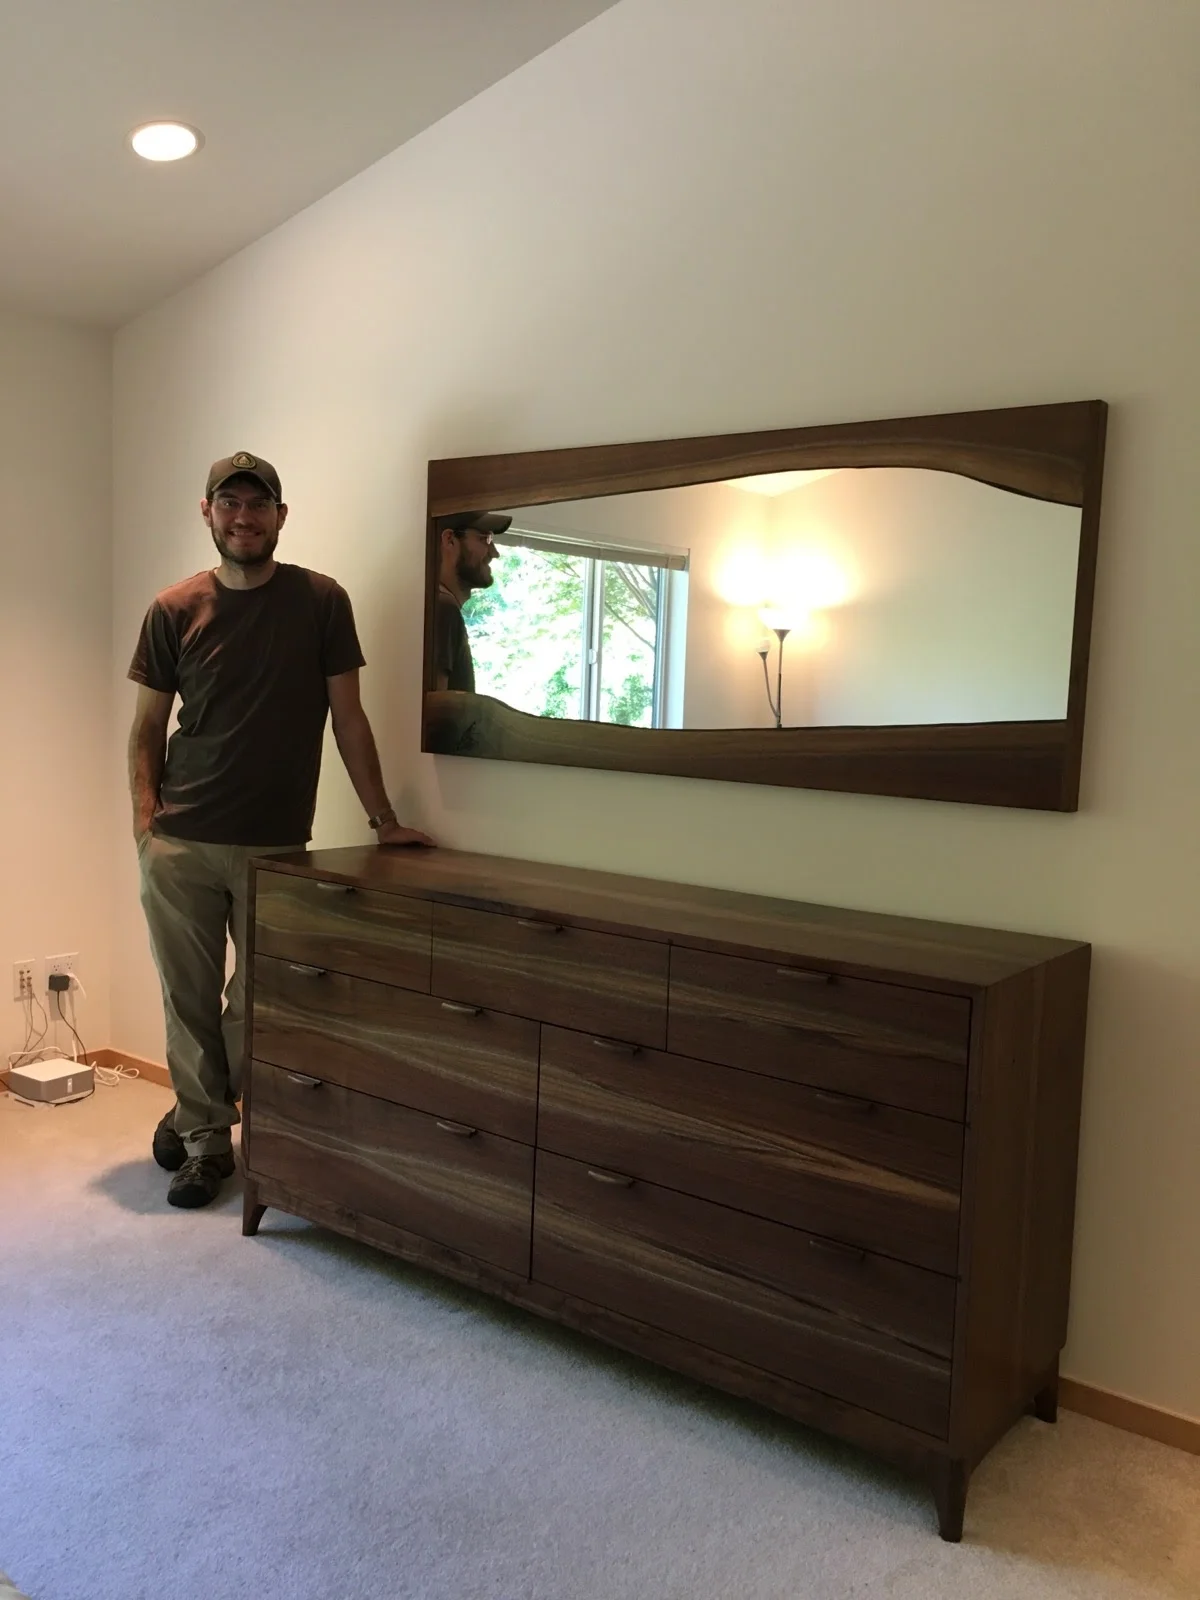
Posing with the dresser and matching live-edge mirror